Last updated on November 4th, 2019 at 10:15 pm
If you own an older RV, there is a good chance you will experience a problem with a non-draining holding tank at some point.
There are two causes for a non-draining holding tank:
- A clogged tank.
- A broken RV waste valve.
It’s almost always the black water tank that clogs to the point it won’t drain properly, but in extreme circumstances, a gray water tank may clog too.
But it is not clogged tanks I want to cover here.
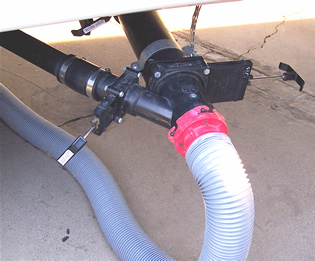
In this tip, I want to talk about dealing with a broken RV waste valve. While some of what I cover here will apply to cable-pull and electric valves, they have additional diagnostic procedures I will not cover.
When a drain valve gets old and clogged with ‘stuff,’ it can get hard to pull the gate open. This extra effort and the rapid stop at the end of travel, once you do get the gate to open, will put stress on the connection of the pull rod to the valve blade. Over time, the valve may, and often does break.
Once the rod separates from the gate, there is only one way to drain the tank. It’s a nasty procedure, but you can minimize the hassle and the mess by being prepared.
The Procedure
Before I go further, I need to say what will be common sense to most. This procedure will take some time. Out of courtesy to your fellow RVers, the work should not be done at a busy public dump station. It should be performed at a campsite with hookups or a less busy dump station. You should also see my post on How to Replace an RV Waste Dump Valve before you get to work.
What you will need:
- A saw that will cut plastic.
- Long needle-nose pliers.
- A replacement waste valve on hand. Make sure it is the proper size.
- RV sewer hose.
- A bucket or pan that will fit under the drain valve.
- Some rags.
- A pair of rubber/latex gloves is a good idea.
Procedure to dump the tank:
- Connect Your RV sewer hose to a septic drain.
- Extend the pull rod all the way open.
- Use the saw to cut through the valve body at about the midsection.
- Place bucket or pan under the valve.
- Use needle-nose pliers to reach inside the valve body and grasp the valve gate.
- Pull the gate out enough to allow the tank to drain through the hose but not out of the valve housing.
- Use rags to minimize waste leaking from the cut.
- Flush tank until water runs clear.
- Let the tank drain completely.
- Remove the old valve and install the new one.
It should be obvious that preventing the need to perform this procedure by replacing the hard-to-open valve BEFORE it breaks is preferable. You get to pick the time and place and avoid a lot of the mess and hassle.
You may also be interested in these articles:
