

I knew when we bought our new fifth wheel that I would eventually have to do something about the holding tank plumbing. A Drain Master electric waste valve was a key part of the makeover.
Our Coachmen fifth wheel bunkhouse floor plan was designed with two toilets, one up front in the bunkhouse and one in the rear with the master bedroom. Apparently, Coachmen couldn’t figure out how or didn’t want to spend the extra money to plumb the two tanks together, so we had to have two sewer hoses going into a ‘Y’ fitting at the sewer hookup. It was a real hassle and required carrying nearly double the amount of sewer hose which was difficult to stow.
But that wasn’t the worst of it. To connect a sewer hose or operate the valve on the front holding tank, I had to get my hands and knees and crawl under the trailer to reach it! That wouldn’t be fun for a young person but for an old guy, it was literally a pain. We had to live with it like that for about six months.
It took me a while to figure out what parts I needed, how to do it, and for the weather to get better, but I finally got time and supplies to do some plumbing.
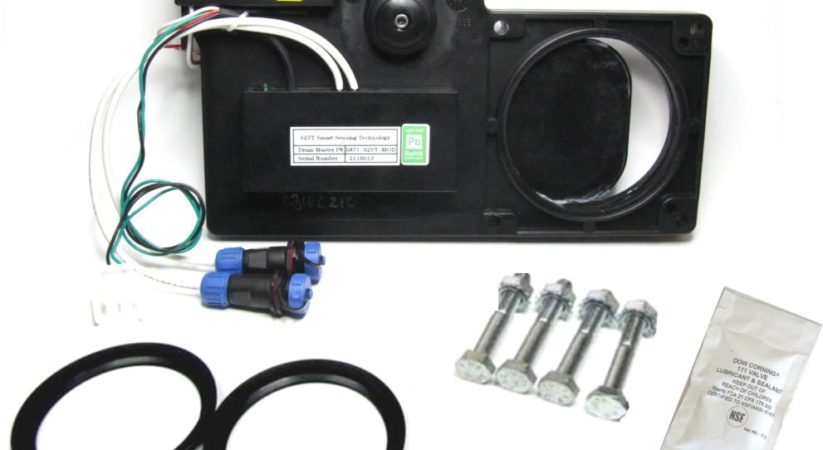
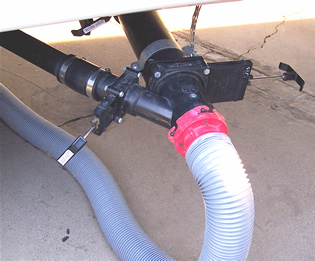
Connecting the two black tanks together was the primary objective but I also wanted a way to operate the front holding tank valve remotely so I would not have to crawl under the slideout. The Drain Master electric waste valve was the perfect solution.
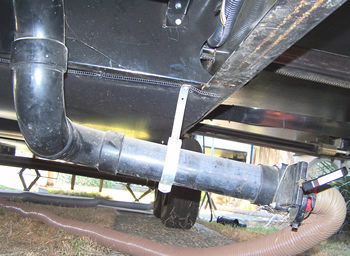
Now once you start looking at the photos below you’ll see a couple of things that may concern you. Yes, I had the same concerns: The pipe going to the back seems really close to the axles. There is no slope to the pipe for proper drainage.
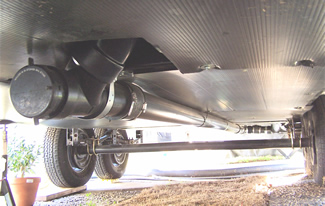
As close as I can measure, even at maximum travel, the axles will not hit the pipe. The design allowed the pipe to be dry when we were traveling so even if it did get damaged there would not be a mess to clean up.
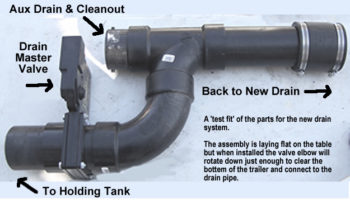
As for no slope, as a safety measure, I included a standard bayonet sewer hose connection in the system to serve as a cleanout. It would be left capped but if that long pipe ever got plugged I could use the connection to dump the tank and have an access point for a cleanout snake.
It turned out the lack of slope was never a problem. For the ten years we owned and lived in the RV after the plumbing was modified the front tank drained properly and never clogged up.
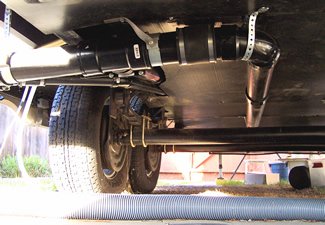
I salvaged the original valve assembly so the new plumbing connection doesn’t look any different from the old one but there is now an ‘extra’ 3-inch valve which was originally the valve for the rear black tank. You can see valve handle for the new rear black tank valve peeking out under the sidewall. The extra valve mostly serves as a safety valve and is closed when traveling. But that valve has come in handy when we’re boondocking. Since the front holding tank is a combination gray/black tank it tends to fill sooner than the rear black-water only tank. With the third ‘extra’ valve closed, it is possible to open both holding tanks valves allowing us to balance the capacity. Plus we will gain the extra volume of the long front-to-back drain pipe. That can add one or two extra days before we have to find a dump station.
You may have noticed the rubber couplers. They serve two purposes: 1) to compensate for my poor plumbing skills and 2) allow the long front-to-back drain pipe to be removed easily to gain access to the underside of the trailer.
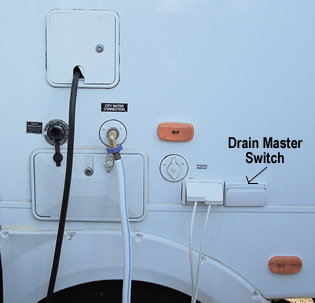
A 12v supply was found and tapped and I used 14 gauge automotive wire run in plastic wire loom to connect the Drain Master to the switch.
A weatherproof outdoor 120v receptacle cover was used to protect the switch. I couldn’t find a smaller cover so there’s room for another switch or connector if I ever have the need.
When pressing the switch, the Drain Master makes just enough noise to give reassure it is working.
Installing the Drain Master electric waste valve was the easiest part of the whole project. If you have a hard to reach valve handle… even if it’s not as bad as mine was… you may want to consider replacing it with a Drain Master. If you are just a little handy, you can do it yourself. Drain Master kit has all you need to replace an existing manual valve and the instructions are complete, accurate and easy to follow. No special tools required. We are pleased with the way the Drain Master works and recommend it to anyone.
You may also be interested in these articles.
How to Replace an RV Waste Dump Valve
Under RV Sewer Hose Storage Tube
RV Holding Tank & Sewer Hose Tips