Last updated on April 13th, 2015 at 09:00 pm
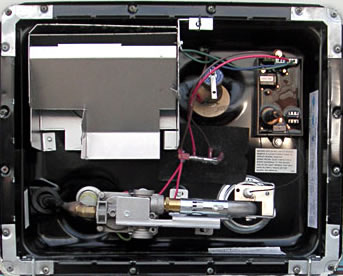
 A while ago I noticed water leaking from our Attwood RV water heater. It was a small leak, just a slow drip. I opened the access panel and found the leak was coming from the drain plug.
No problem I thought, I’ll get a wrench and give the plug a half turn and all should be good.
As soon as I put the slightest torque on the wrench the head of the plug broke off and a steady stream of water flowed past what was left of the plug still in place.
After a quick dash to the park water faucet, I eventually managed to remove the plug remnant from the tank. I could see that, while the head of the the plug looked fine, the part of the plug actually threaded into the tank had become discolored. It was also hard and brittle. The end if the plug was not even round.
The water stayed off while I made a run to a nearby RV shop for a replacement plug. Having the water off wasn’t a huge problem but it was an avoidable inconvenience.
Lessons learned:
- As full time RVers our water heater is almost always hot. The constant extreme heat will eventually cause the plastic drain plug to fail.
- If the plug wasn’t leaking when it was first installed, trying to tighten it probable wont fix the leak.
- Buy a spare plug. You might not be close to an RV shop or the shop may be closed when you need one.
- Before you attempt ANY work on the water heater, turn it off and let the water cool.
- It’s a good idea to turn off the water supply to the RV before working on anything plumbing related.
- That spare drain plug is the same size as the plumbing supply lines. You can use it to plug a toilet or faucet line if you need to remove and repair/replace them. (you’ll need two plugs for a faucet… hot and cold lines.)


And while you’re in there, why not clean out all the gunk in the bottom of the water heater?
Absolutely… sorry I forgot that. I actually did flush out the tank.
How did you get the plug out? I have a similar issue but it seems there may be particles left in the orifice as a new plug will not fit.Can you re-tap the threads?
It’s been a few years since I had the leaking plug so I do not remember the actual process. The remaining plastic was very brittle and I think I just broke it apart with needle nose pliers. But you could use some sort of pick too.
As for cleaning the threads up once the remaining plastic is removed, a wire brush should be enough. I suppose, worst case, you could chase the threads with a same-size tap but remember, the tank is aluminum and soft so be careful not to damage the threads. Try the least aggressive cleaning options first.
I changed mine out for a metal plug,and Teflon tape. Woks great.
DO NOT PUT A METAL PLUG IN!!! You’ll have electrolysis issues due to dissimilar metals and have corrosion in the tank
Good point, Eric. Thank you for adding some good information.