
Last updated on May 3rd, 2016 at 01:42 pm
Fran and I have been RVing for over 19 years now. Most of that time as full timers. We’ve stayed in many RV parks and campgrounds and other places. In all those years I’ve never had a need for a macerator pump. That changed a few months ago.
In mid November 2012 we we’re parked at Lake Minden, a Thousand Trails park about 20 miles south of our hometown of Yuba City. Our plan was to alternate between Lake Minden and Lake of the Springs, another nearby Thousand Trails park, through the Holidays then head south to Arizona.
That changed when we got a call from #4 son Drew. He told his Mom that he wanted us to park in his driveway for the holidays. He said he was committed to do whatever it took to make us comfortable there. He has a big driveway so we drove into town to talk about the logistics of where we would park and how we would get hookups.
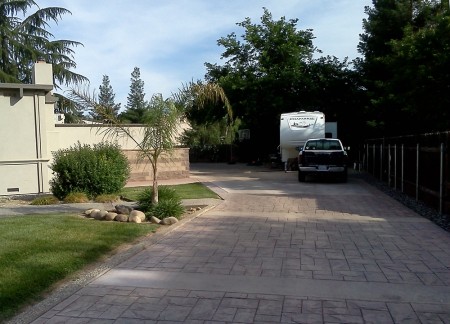
We did some basic measuring and decided there was plenty of room at the back of their driveway to park our house.
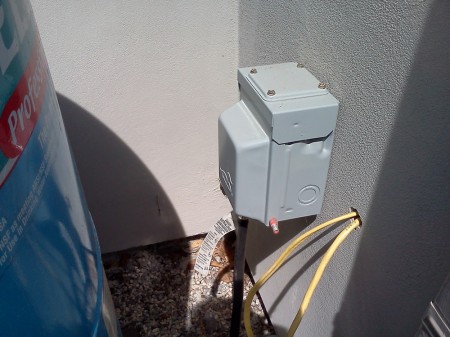
Water wasn’t a problem, there was a faucet nearby. We determined that, with the help of his Brother Kurt, Drew could install a new 30 amp circuit with an RV receptacle box. We would need a 50 foot RV extension power cord to reach the RV and the power cord would have to run across the driveway. That meant we would have to protect it from car traffic. Some 2x4s fastened together with a space between for the cord would solve that problem.
Which left us with the problem of no practical way of dumping the holding tanks. There was no suitable access to the main sewer line. It was at least 150 feet away. We discussed using a toter tank and Drew said he would be willing to do the toter shuttle whenever we needed it done. But I knew he had no concept of how often the process would need done and what a hassle it would be. Also if we needed an ‘emergency’ dump he may not be available.
The solution seemed to be a macerator pump. The Flojet Portable RV Waste Pump only required a 3/4 inch garden hose and, according to specifications, had the ability to pump the waste up to 50 feet. Not needing to dump into a large sewer line meant we could use a drain clean out but we didn’t have one. Drew said he could plumb an extension off the drain line of the laundry room through the outside wall. The 3/4inch ‘sewer hose’ would cross the driveway with the power cord. Only problem was we needed about 60 feet of hose to reach the RV.
With a bit of hope and a reasonable plan I ordered a FloJet and purchased a 75 foot hose with the thought that if the pump couldn’t handle the whole length we would cut it to the length we needed and see if that would work.
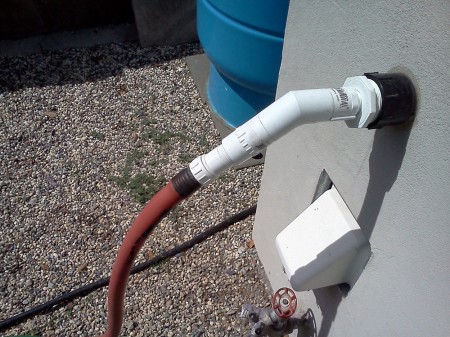
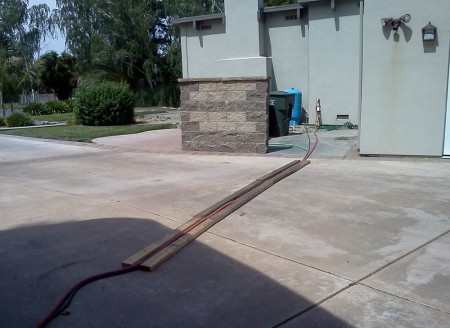
Not the ideal solution but it work.
Of course the macerator pump having a 12 volt electric motor meant it needed a 12 volt power source. I chose to run a line under the RV directly from the batteries (30 amp fuse at the battery). I purchased a 50 foot 12 gauge extension cord, cut the ends off and fished the cord from the batteries back to the sewer dump valves. I used the wiring kit that came with the macerator pump but used a different plan for the installation that better fit my needs.
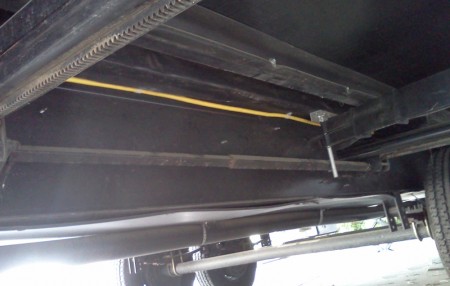
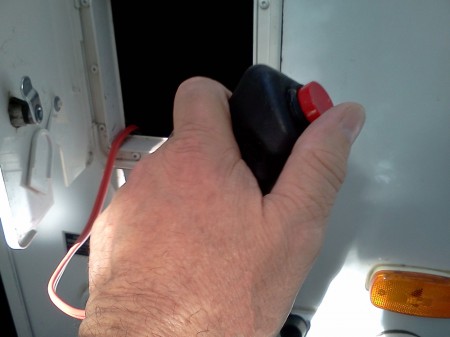
I used the wiring kit that came with the pump but wired the power switch to fit my needs. The switch is wired in permanently and when not in use it is stored inside to hatch to the RV power cord compartment.
I’m happy to report the macerator pump worked just fine even with the full 75 foot hose.
I kept the macerator connected all the time we were there which allowed us to dump the tanks whenever we wanted with the same convenience of a standard RV sewer connection.
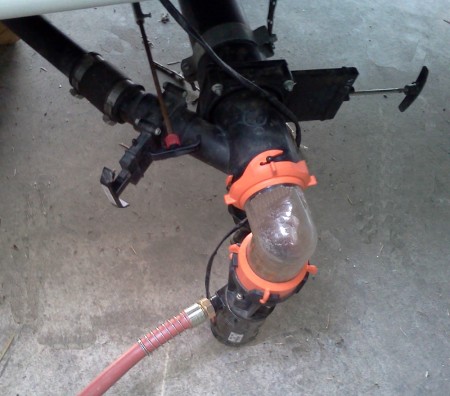
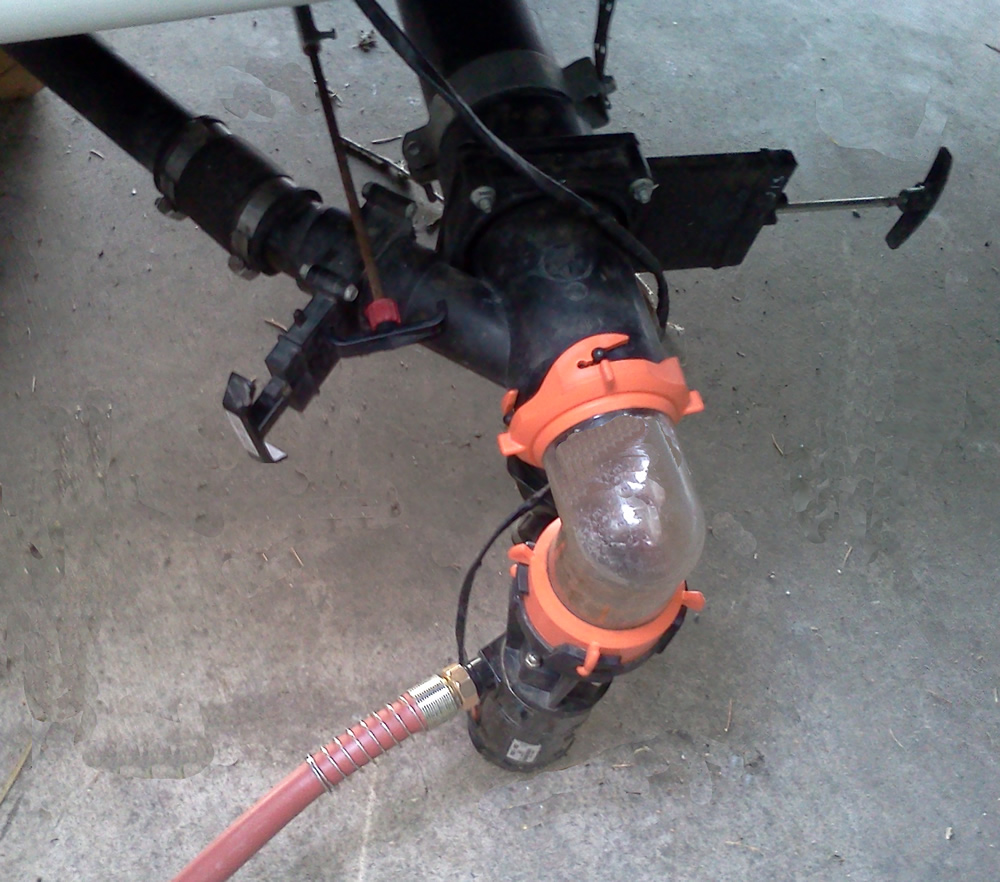
The pump is left connected when we are parked. The clear elbow make it easy to see when the tanks are empty.
You gotta know that pumping through a 3/4 inch hose isn’t going to be as fast as dumping the tanks through a 3 inch hose directly into sewer pipe but I was expecting it to be slower than it is. I can dump a 45 gallon tank in about 5 minutes although I have not timed it exactly. That is fast enough for me even when dumping all three tanks. I’m not in a big hurry.
We developed a routine where I dump the gray tank evert two to three days and the two black tanks every other time I dump the gray tank. On this schedule we didn’t have to be especially conservative with water usage.
We stayed At Drew & Jennifer’s through the holidays to the end of January when we headed for Arizona. After a couple months in AZ we spent about a month in So Cal at #1 son Mark’s home.
We’ve been staying at Mark’s for years and even though the sewer connection wasn’t all that close I managed with an 35 foot length of 3-inch sewer hose. Even though it worked it was never satisfactory. This last visit was different since I used the macerator pump. What a difference it was too. I wish now I would have bought a macerator years ago just to use at Mark’s house.
So, here it is mid-May 2013. We are back in Yuba City, again parked in Drew & Jennifer’s driveway. I’ve had time to really put the FloJet to the test and it is still working great.
It’s nice being neighbors with our son, daughter-in-law and the grandkids. You can’t really get to know them until you spend time with them. Time you just can’t find if you’re camped 20 miles out from town. The macerator pump and some ingenuity made it possible.
Empty holding tanks with the press of a switch!
Eliminates bending, reaching and straining to open the waste valve on your RV. Attach the hose and press the switch to drain your tank. An LED indicator shows when valve is open, to avoid accidental leaks and spills.
Easily attaches to your manual valve. Draws less than 2.5 amps of 12-volt power during operation. Opens and closes in about 2 seconds. Manual override if power fails. Fully sealed motor. Made of aluminum, stainless steel and ABS plastic, so it will not rust or corrode. Includes switch with LED indicator and label for mounting near valve. Barker 3″ Auto Drain RV Waste Valve





We just bought a used pump from an individual. We are new at this so would like to ask you a couple of questions if you do not mind.
We are having trouble getting the plastic attachment on the motor home that the tube goes into loose, it is stuck, don’t want to break it, any suggestions?
The clear attachment that came with the pump will not go onto the pump, it starts but will not click into the lock mode. Is there any lubricant or what can we do?
Take a photo or two of the pump installation… close-ups of the fittings. Take the photos to your RV tech for his advice.
What type of tool is being used to cut the front of the macerator? It looks like some type of lathe. What ever it is I don’t have one. Any suggestions what else I can use to cut the macerator?
If I can possibly cut the macerator correctly, what PVC fitting can I ask for at the hardware store?
I did not make any physical alterations to the macerator pump. The only thing I did was add Anderson Power Poll connectors to the pump’s power line. Because it was not intended to be installed permanently the connectors allow the pump to be removed from the sewer line for cleaning and/or storage.
Thank you for your reply. Somehow I asked the question to you. I was looking at your post also and your set up was going to be my second choice, only because I purchased a sea flo macerator in error and I am trying to make it work. I was trying to ask the question on open road forums. There is an article with pictures called home made macerator.
After reading all the posts I came up with an idea to make the sea flo macerator work. If it’s a success I will post it here.
Thanks again.
My husband hooked the water house up to ours to flush out the 3/4 ” hose we use. He left it hooked up but, closed off the grey and black water…well, somehow it backed up into our rv! What a mess! We love the pump and have had it for several years and this had never happened…HELP!
Wow, I can imagine the mess. But, from what you have explained, I cannot imagine how that happened. Sorry, I just can’t work that out in my brain. Maybe more specific info about the process?
We found, what we think, was the problem…our grey water valve broke and did not shut completely (something we were not aware of), allowing it to back up into the pipes and on into the rv! We were not living in the rv, only in and out doing some repairs and very little grey water was being used, if any. We will have to get this fixed and cross our finger for the next doniker dumping!
Thank you for the follow-up letting us all know what you found.
So interesting, I have my fifth wheel parked in my daughters back yard, I planned to hook up to their sewer but we are on a flat and it is a slight grade up to the sewer and it will not pump up we are about 25 feet away from it someone suggested a macerator pump but I am female and no nothing about them, do u think it would work, we have water and electric connections. Do you need a special toilet? We only need it for the toilet. Would love some suggestions
Shirley, A macerator pump will certainly work for you. I use a FloJet portable RV macerator pump. You will also need a minimum 3/4 inch garden hose long enough to reach the sewer connection. A 1 inch diameter hose would be better but can be expensive. You will also need a source of 12 volts to power the pump. Re-read this article and study the photos. If you have specific questions post them here and I’ll try to answer them.
I’ve been toying with the idea of getting a macerator for a long time. You still have to flush out the black tank after emptying though, correct?
We do mostly boondocking, but have run into RV parks where our hose actually went uphill until I put out a bunch of wood blocks and leveling ‘Legos’ to give us at least a hint of downhill flow. Sounds like the macerator would have totally eliminated this problem.
Your well written description article has helped immensely. Thank you.
It should not be necessary to flush the black tank every time you dump. But that depends on how ‘frugal’ you are with water. It you have plenty of water in the black tank before you dump it, the less you’ll need to flush it after.
A macerator pump can be handy and the hose is usually easier to store.
We’re happy you found the information helpful. We all learn from each other.
We just bought a flojet
First time using on grey tank had not tightened fully and the Flo jet came off!! Very glad it was not the black tank
When tank was empty water was still in the hose (we did not back flush but will do in future). Any tips for getting water out of the hose when finished (we held hose up and walked it to the drain but was not the cleanest way due to dripping. Any good tips please before I try the black tank please????
Emptying the holding tanks is never truly sanitary. We can only do our best to minimise the mess.
‘Walking the hose to the drain’ is the only way I know to empty it, but flushing it with clean water first is recommended. Take your time emptying the hose to get as much water out as you can. Once empty, you can connect the ends together to minimise dripping and odor.
We bought the flojet but I’m wondering if we need to have a heavy duty hose or just a good quality 3/4″ garden hose? Thanks!
It is the diameter of the hose that is most important, 1″ inch would be better but 3/4 inch is the minimum recommended by the manufacturer and I have had no problem using that size. The hose’s durability depends on where and how much you plan to use it.
We have used similar set-up many times on trips that put us in a place where dump points were few or not available either. We have most recently used ours for extended time while home is being repaired from hurricane damage. It has worked great – except for one thing — We have found that the holding tank chemical in the plastic “dissolvable” pods do not dissolve completely. We had some wrap around the blades of the macerator to the point it hung up the motor to the point of overload and fuse blown.
Fortunately (and quite by accident) I had installed an extra valve just behind the macerator – this allowed for very little “stuff” to have to be contained when I removed the macerator to investigate the problem. Had to take it apart to get to blade — all in all, it wasn’t too bad a deal, since the extra valve was there.
We now use only the liguid in the bottles when we are using the macerator and use the “pods” when hooked to a regular dump point.
Also, don’t ever put “wipes” of any kind down the drain — some folks don’t know that they don’t break-down — they will clog your pump very fast —-
Love our FloJet — it has saved our bacon several times.
Forgot to add —- very good post from you – well thought out and the pictures should be a big help to anyone new to the FloJet (or other macerator). You experience shows. Will add — your hint on the larger 1 inch hose is right on — will cut down on friction in the hose and allow for less stress on pump.
Thank you for sharing your experience with your flojet, it adds a lot to the discussion.
Thank you.
can this Flo Jet be used in winter months?
You should be able to use it in winter as long as it is not so cold that liquid in the hose will freeze.
We have been using Jabsco and Flow-Jet pumps on our RV’s for 20 years or so. We never use dump stations except on rare occasions when we travel outside of Alaska. We have a 125′ hose (1″ ID ‘Tiger Flex) that runs from in front of our house to the sewer clean-out at the back of the house. On the Flow-Jet you simply remove the garden hose adapter from the pump outlet, slide the hose onto the outlet and secure it with a hose clamp. Garden hoses (5/16 and 3/4 inch ID) have too much resistance for 100’ plus runs but are O.K. for shorter runs.
I made an adapter for the pump with a section of 1″ clear vinyl hose (available by the foot a Lowe’s, Home Depot, etc., with a 1″ quick connect hose fitting on the outlet end. The hose fittings are heavy duty with a male and female fitting that clamp together with two levers on the female fitting.
We always dump at home so there is no line in front or behind us and I can dump, rinse, etc., at my own pace and when I want to do it (in winter we use MgCl to keep the tanks from freezing and incandescent light bulbs to keep the valves from freezing.
We bought rebuild kits for the pumps the include impellers, gaskets etc. In winter if the pump is not stored in a heated area (garage, etc.) the pump should be filled with anti-freeze or MgCL solution so it doesn’t freeze. If the pump freezes the vanes on the rubber impeller will shear off when you start the pump (been there, done that, hence the rebuild kits).
I recommend spraying ArmorAll into the pump and on the gaskets at least every other time the pump is used. This preserves the impellers and the pump attaches more easily.
Since our hose is outside year round, in winter after draining the tank I detach the pump from the tank and run a couple of gallons of MgCl solution through the line so I don’t have to wait for spring breakup to drain the RV again.
Note: MgCl (magnesium chloride) is sold as an ice melter (at Costco in Anchorage). MgCl is less corrosive than other salts such as NaCl, CaCl. It is also not toxic to lawns but if too much goes on grass it may cause a ‘fertilizer burn.’
Incidentally, about seven or eight years ago the seal on our Dometic toilet failed due to age and freezing.
We messed with it for a few trips and after the trips, we put ArmorAll in the drained toilet. The seal started working again and is still working.
This is really good information, Jim. Thank you for taking time to share your experiences with us. I, too, have done rebuilds on my pumps, even bought a replacement motor once. I’m not usually a fan of ArmorAll specifically because it does tend to soften rubber over time. But I hadn’t thought about using it to soften rubber that’s gone hard. I’m a slow learner.
I know nothing about RVs but my project is to purchase an RV for my brother to live in by my house all year round. I’m in northern MI with snow and frozen ground. Is it possible to just run a regular pvc sewer line from the RV to my crawl space under my house and tap into my home sewer line? Would I need the flo jet pump? I imagine I’d need a holding tank in the home crawl space and pump waste into home line but don’t know anything about the RV end. I plan on digging below the frostline for the sewer and just run the grey and black water into the pvc. I’ll also run electric, internet, TV, water line and anything else I don’t know about yet since I’m digging about 4 foot deep with a backhoe. At the other end I’ll have my propane company tap into my home propane tank. Does anyone know if this will work? Any suggestions would be appreciated.
I don’t completely understand what you are attempting but if you can run a sewer extension from your existing plumbing, in theory, you would not need the macerator pump or a holding tank. Most RVs have internal holding tanks that can be kept closed until full, or nearly full before they are dumped. Some Park Model RV don not have holding tanks and require a connection to a proper sewer drain. I would highly advise you to consult a professional plumber if you are at all unsure of what you need to do.
Hello Steven,
Read your article and it nearly echoes our situation. We bought a Flojet pump and have it hooked up “permanently” for a few months. But like your experience, the problem is the power source. Currently, I’m disconnecting the battery (at front of trailer of course) each time we need to pump (every other day for the gray water) and hauling it back to the sewer connections/pump. This is quite a chore.
I’m not up on my electrical (I’m afraid of shorting something out – or blowing something up) so my questions: 1) if I were to make some kind of permanent power connections, (as you did) what gauge wire would I need (to match the size of wires that came with the Flojet pump? 2) there are two sizes of connection posts of the battery, do I connect the wires to the larger posts or the smaller posts (that the trailer is connected to)? 3) would leaving the pump connected in this way have any adverse effects on the battery? Looks forward to your advice. Thanks
I used a 12-gauge contractor-grade extension cord to get the power from the battery to the pump. I just got on long enough, with a little extra for making connections and cut the ends off. I soldered ring terminals to the battery end but you could crimp them instead. (I also included a 25 Amp fuse inline on the positive terminal.) Since I wrote that article I have a different RV but it is set up much the same way. the only difference is I am using plug connectors at the pump end. I just connect the plugs when I need to operate the pump. No switch. It was just simpler to do and works fine. You could cut the male plug off the battery end to put on the pump.
It occurred to me that it may be simpler to purchase a battery and cheap trickle-charger to keep at the pump and just connect it as you are doing now.