Last updated on October 21st, 2019 at 11:51 pm
My RV outdoor shower is leaking water, I thought I could get to it from the inside but when I took off the air return there is the converter sitting right in the way of getting to the water leak, now the question is do I take it apart from the outside ? not sure if there is enough room to pull the whole unit out to get to the back of the shower unit I don’t want to break anything ? any help is appreciated. Thanks, John in Az
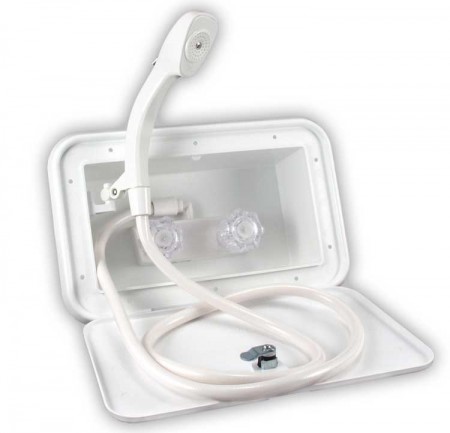
If the RV outdoor shower unit is not readily accessible from the inside, you’re left with getting at it from the outside. It’s not a big project, though. And may actually be easier than if you could reach it from the inside. The only concern would be if there is enough ‘slack’ in the plumbing to reach the back of the shower unit once pulled out of the wall. There is a good chance there is enough slack to at least tighten the connections or undo them to get to a leak inside.
What you’ll need:
- Putty tape, Butyl tape, or Foam tape whichever was used in manufacturing the RV. Although either can probably substitute for the others in this application. All tape types should be available at any good RV shop/part store. If you don’t know what type it is, bring a sample with you to the shop.
- Some type of solvent like bug and tar remover or WD40 to remove the residue of the old tape. Be careful about what you use. Some strong solvents may damage the finish. Not sure? Test on a small out-of-the-way and less visible area.
- A putty knife or similar tool to help release the shower unit from the wall may or may not be necessary.
-
Robertson Screw head The proper screwdriver. Most modern RVs are assembled using screws with a Robertson, also known as a square drive, and it’s almost always a #2 size. But you may find some other fastener used.
Procedure:
- Remove and set aside the screws.
- Turn off water to the RV.
- Gently work the unit away from the sidewall. Use the putty knife as needed. be careful not to scratch the wall or crack the plastic frame.
- Make the necessary repair. You will probably only need to tighten the fittings, but don’t over-tighten.
- Once the repair is completed, turn the water supply on and check for leaks. If no leaks proceed.
- It’s always best to replace the old sealant tape, but if you don’t have replacement tape, you can use the old tape, at least temporarily. If you must re-use the old tape, try to leave it in place on the wall by removing the shower unit from it. You may not be successful, but try.
- Take note of how the original tape was applied so you can apply the new tape the same way. Take a photo.
- Remove the old tape.
- Clean the area around the opening with solvent to assure proper adhesion of the new tape. Wash all solvent off with soap and water.
- Apply new tape. If you took note of how the old tape was applied, that’s good. Otherwise, on flat walls, you should need just one layer of tape. If your wall has a pattern of ridges and valleys, you’ll need to use enough tape to fill in the valleys.
- Set the shower unit back in the wall and press into the tape as much as you can without cracking the plastic.
- Replace all the screws but do not tighten them. Once all the screws are in, tighten each screw a little at a time going around the shower frame until all the screws are snug, DO Not Over Tighten, you will either strip the screw hole or crack the plastic. You only want to seat the shower unit on the tape. This isn’t rocket assembly, if it looks okay it most likely is. If you are unsure, wait a day or two then give each screw a quarter to half turn if they need it. Don’t force them.
The above process may seem complicated, but it is not, and the project should take you less than an hour.
This same basic procedure can be used to remove and replace any through-wall appliance, hatch cover, or window.
You may also be interested in this article:
